General Maintenance
 |
This page is here to provide some pointers on what to look for while doing routine maintenance on your vehicle. Many of these items you need only check, some items like oil and transmission fluids may need replacing. For schedules of maintenance, you may look here or in your owner's manual. If you have any questions, please feel free to email me and ask. |
 |
Check Brake Fluid: If you look on your master cylinder, you will find two marks- a full mark and a low mark. The level should fall between these when the car is cold. As your brake pads wear, the fluid level in your master cylinder will drop. If the fluid level is approaching the "low" mark, you should also check your brakepads for wear. If you are losing fluid quickly, inspect your brakelines for leaks. |

|
Check Clutch Fluid: If your car is equipped with a hydraulic clutch system, you aslo have a master cylinder for your clutch fluid. The clutch system uses the same brake fluid you use in your braking system. It has a high and a low mark, and should fall between these marks when the car is cold. |
|
Check Coolant Level: The fluid level of the coolant system is rather hard to see, as it is indicated at the very bottom of the overflow/expansion tank, and is located on the backside (the side facing the firewall of the engine compartment). It has a high and a low mark, and the level should fall between these when the car is cold. |
|
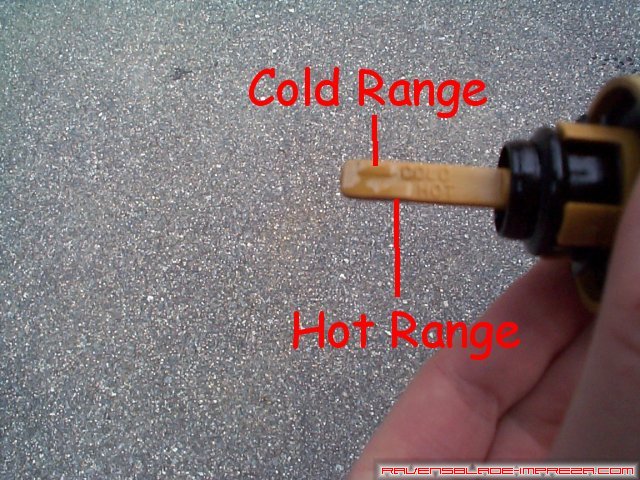
Check Power Steering Fluid: Your power steering fluid cap has the dipstick attached to it. Remove the cap, wipe off the fluid present, and reinsert the cap. There is a range for cold and a range for when the fluid is hot, and your level should fall somewhere within those two ranges. If the fluid level falls low or you hear a squealing sound when turning, you may have a leak and you should inspect the lines and fittings starting at the power steering pump and working back to the power steering rack located below the engine crossmember. |

|
Check Transmission Fluid: The transmission fluid dipstick is hard to find, but it is located on the passenger side of the transmission below the airbox. It has a simple low/full mark on the dipstick. Make sure you fall within these two marks when the car is cold. If you have an automatic transmission, you should also check your front differential fluid level. The dipstick for this is located on the driver side of the transmission in about the same spot. On the manual transmission vehicles, the front differential shares lubricant with the gearset. Changing the transmission oil will be covered a little later. |

|
Check Oil Level: There are three marks on your dipstick- two holes and one notch. the bottom hole is the "low" mark, the top hole is the "full" mark, and the notch should be the maximum height of oil when the engine is hot. Too much oil can be frothed up by the crankshaft, which is just as bad as running with too little oil. Changing the oil will be covered a little bit later. |

|
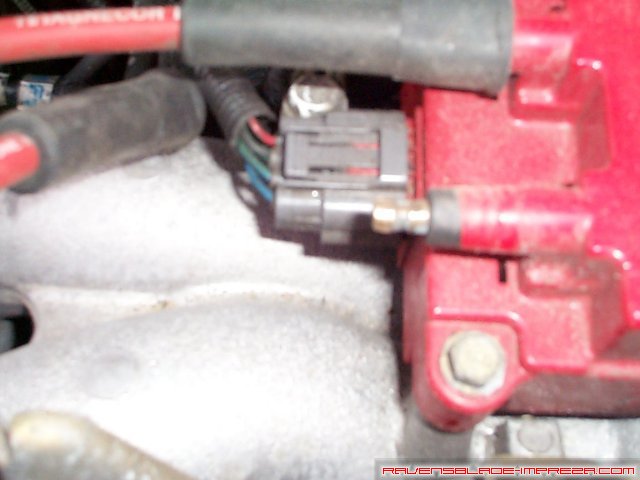
Check Plugs, Coil Pack, and Wires: The plugs, wires, and coil are the life of your engine. Bad plugs or wires or corroded terminals not only hurt performance and gas mileage, but can do physical harm to the engine. Check your plug wires for cracks or damage, and pull the boots off to check the terminals. In this photo, you can see a bit of corrosion on one of the terminals on the coil pack. This can be cleaned up with a wire brush or fine-grit sandpaper. |
|
With the terminal clean, applying some dielectric grease to the terminal and the boot will keep moisture from penetrating, which is what causes the corrosion in the first place. |

|
Check the Alternator: The main + terminal of your alternator can suffer the same corrosive effects that the coil pack endures, henceforth the red rubber boot over the terminal. Pull the cover back and check to ensure the terminal is in good shape. |


|
Check Battery Terminals: A battery with corroded terminals is one of the facts of life. Water and road salt get into the terminal connectors and you get some corrosion. Check the connectors, and clean them up as needed with a wire brush or fine sandpaper. Also, this would be a good time to check the battery in general for leaks. |

|
Check Belts: Loose or stretched belts can be a nuisance- they squeak and rob accessories of power or worse, the alternator of its ability to recharge the battery. Worn or cracked belts are worse- they can break and leave you stranded. Check your belts for cracks or breaks, removing the belt cover if necessary. The belts should deflect slightly when pressed upon (the exact acceptable amounts can be found in your owner's manual). If they are too loose, they can be tightened via the nut located on the belt tensioner. |

|
Check/Replace Air Filter Element: If you have a disposable air filter element, it should be changed every 15,000 miles or so, more frequently if you live/drive in dusty conditions. If you have a reusable filter, it should be at least inspected, if not removed and reoiled. There are three clips holding the airbox closed (four if your airbox is located out at the fender) as indicated in the photo. Ensure you seal the box well when you reinstall your filter, as an improperly sealed filter box can result in a Check Engine Light. |

|
Change Fuel Filter: The fuel filter is much easier to change than you would think. Make sure you leave it overnight however, as this will allow the pressure in the fuel system to dissipate. If you try changing it right after having driven the car, you will quite literally get a gusher when you take the fuel lines off. Pop the locking clip open (just pull up on the tab) to free the filter from the strut tower. |

|
With the filter free of the strut tower, you need only loosen the two phillips head screws on the hose clamps, and pull the fuel lines off of the filter. The fuel lines may be difficult to remove if it is cold out or it has been a long time since the last change. This can be helped by either pouring hot water on the lines to soften them (or use a hair dryer) and by twisting the lines to loosen them. Be careful though! The filter will have a good deal of fuel inside it still! |
|
Inspect Brakes: This is not a process that I have any photos or real-world advice on. Basically, remove your wheels, check for brake fluid leaks, and check for uneven or excessive wear on the rotors/pads. If your brake pads start to get too thin, they may crack, so replace them if they are getting down to 1/4" thick or less. |