Installing a STi 6 Front Lip Spoiler
 |
These are some quick instructions I put together for installing the STi Version 6 Front Chin Spoiler. It is a direct fit for the MY99-00 bumper, and does not cover up the brake cooling ducts as some chin spoilers do. It is simply held on by 11 nuts/bolts total, and will take approximately 30 minutes to install. |

 |
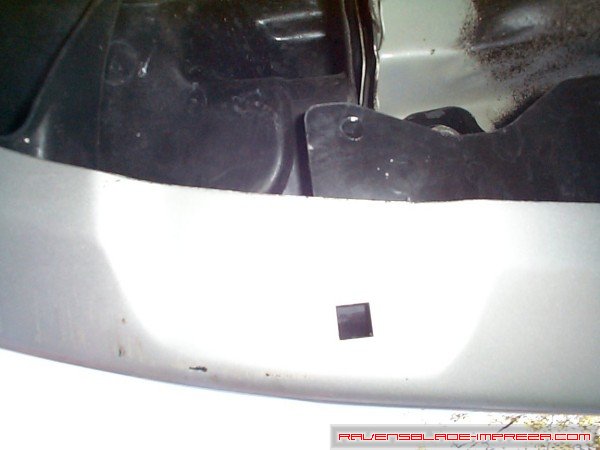
If you order the Version 6 Front Chin Spoiler by part number, like I did, you will receive just what you see above: the spoiler with no hardware! It apparently doesn't come as a kit. I simply went to my local hardware store and purchased a total of 11 bolts, 11 nuts, and 22 large flat washers (I recommed stainless steel, as it will not rust or discolor). The bolts were M6 (metric, 6mm) and about 2cm (about 3/4") long: you can use longer bolts for 8 of the holes if you feel the need, but holes 4, 6, and 8 MUST be that short: they are directly underneath the lower front bumper beam (see the picture 3 below this one: the big black thing towards the top of the picture is the beam), and a longer bolt will hit the beam, pushing the chin spoiler and bumper cover downward. The nuts were also M6. The flat washers were about 2cm (3/4") across. Next, where all that hardware goes... |
|
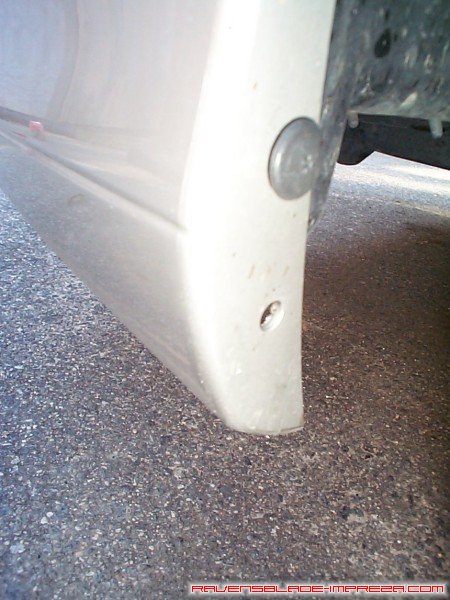
This is where we start. In each front wheel well, you should see one black screw rivet, which holds the plastic mudguard lining the wheel well on, and one hole that is not being used: the unused hole is the one that will be of interest to us. Now, you need to stick your head under the front bumper to see the other holes used to attach the spoiler. |

|
Ok, here you can see one of the nine remaining holes used to attach the spoiler (they are all square holes) and the side of our 250,000 mile Legacy L Wagon! I believe Subaru probably uses trim plugs, much like the ones used to hold the sideskirts on, to attach the chin spoiler, but I like using the stainless hardware. At any rate, the remaining nine holes are spread evenly around the bumper: five along the front and two on each side. |
|
NOTE: It has come to my attention that on the 1999 Model Year Imprezas, you may not have the holes predrilled through the bumper. You may have to put the chin up, mark and drill the holes, and then install the spoiler. You can mount the spoiler with only the two holes in the wheel well (the fiberglass replicas mount with just these two holes) but I would put at least three more along the front- I would not want to have this spoiler fall off! This does not apply to any of the 2000 or 2001 Model Year RS's. |
|
In this picture, you can see one of the holes below the bumper beam, which require the short bolts, as mentioned above. |
|
Now, The Instructions |
|
You might need two people, but the first thing to do is to slip the edge of the chin spoiler up over the corner of the wheel well on both sides. If you are alone, it should hang on there, due to the shape of the lower bumper. After both sides are on the corners, proceed to lift the spoiler up towards the sky while pulling the spoiler toward the front of the car. Because of the shape, it actually will "clip" onto the bottom of the bumper, right at the corners by the brake vents and in the center under the license plate holder. You'll feel it "clip" and then it will stay up all on its own. From here on out, it could not be simpler... there are no curve balls. Now, back to the wheel wells. What you need to do here is take and put a bolt through a washer, and then put both of them through the spoiler and then through that empty hole in the bumper. Next, put a washer on and then a nut, and tighten it down. The washers may seem like overkill, but they will keep the hardware from damaging the spoiler and the bumper. With that done, go and do the same thing in the other wheel well. |
|
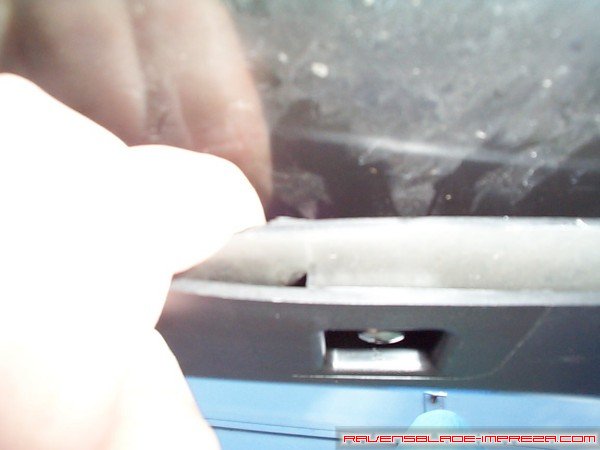
The next hole to do would be the centermost hole (labelled "6" in the topmost picture). Why? It will make certain that the spoiler is centered on the car. I lied, there is a small curve ball: for the center three holes, you need to stick your fingers between the bumper beam and the cover (you can see me jamming my hand in there in the picture: the shiny black thing is the beam, the silver thing is my bumper cover, and the fleshy thing is my hand). After that, I just proceeded around the bumper, putting bolts in the other holes. It really does not get much simpler! No removing of the whole bumper or anything! |
|
Ahh, The Fruits Of Your Labor |

|
The spoiler does not stick out much, and is more of a styling enhancement than some kind of Banzai war spoiler you might find. As you can see, you do not lose the use of the brake vents. |

|
It does not stick out or down too much, so you should not need to worry about scraping this chin spoiler on the ground. |

|
This picture and the next few are just some closeups, showing how well they match the sideskirts, and how nice the spoiler looks installed. |

