Installing a STi 6 Rear bumper cover
 |
This page will be concerned with modifying the STi bumper to fit the stock rear bumper beam and how to attach the license plate bracket and license plate lights to a bumper beam never designed to accept them. Please feel free to email and ask any questions. Comments are always welcome. |
 |
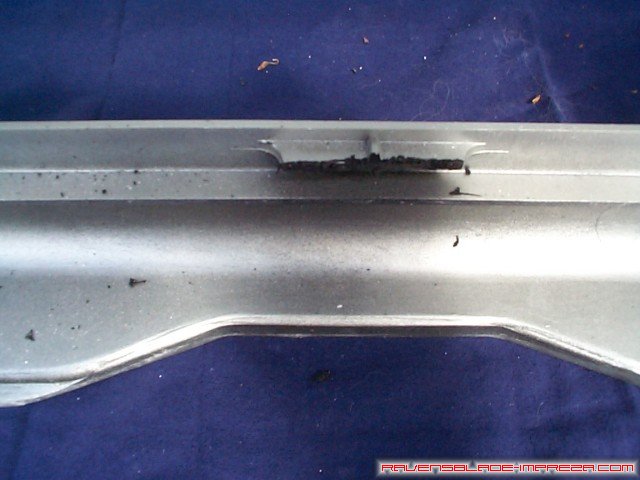
So this is where we start. After following the directions on removing the bumper cover, you get to stare at the less-than-beautiful bumper beam. The shape of this beam ends up causing a lot of trouble, as the Version 6 bumper cover was not designed to fit onto it. With a little time and some power tools, it is not hard to modify the cover to fit the beam. |

|
You will see 3 red dots in this picture. The lower one in the middle is a tab with a single hole in it, used to hold the cover to the bumper beam. Unfortunately, we do not have the STi bumper beam, so you need to cut it off flush. The other two red dots are items shaped like a letter "L." I am not sure what these are either, but they need to be cut back flush with the cover, so that you can attach the license plate bracket in a later step. |

|
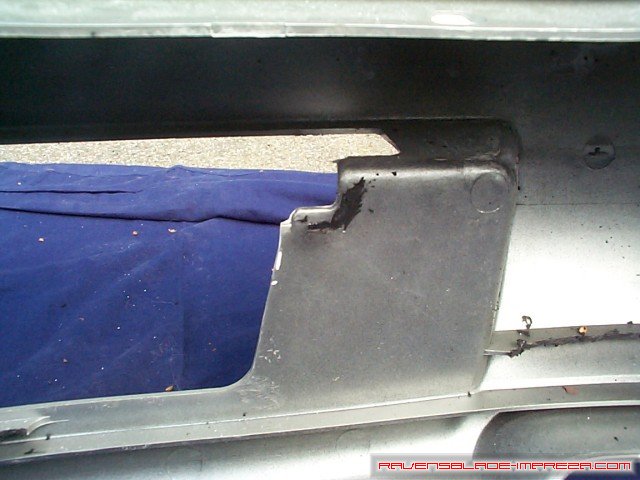
A close up of the bottom center tab cut. |
|
A close up of one of the "L" shaped items cut back flush. |
|
A close up of all three items shaved back. |

|
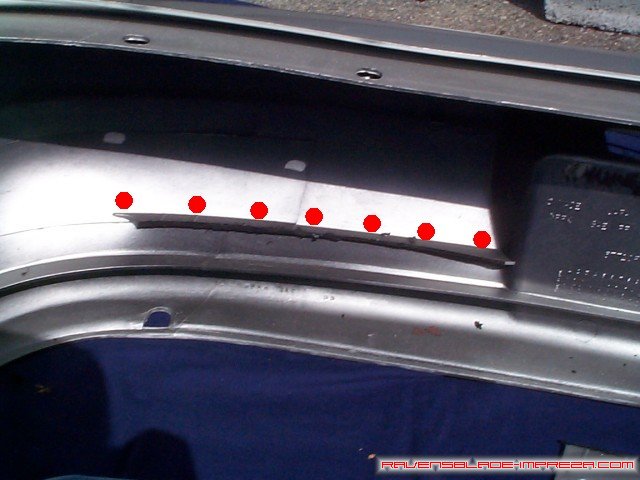
In this picture, you will see a string of red dots. There is a "rib" along these dots that will need to be cut back- there is an identical one to the other side of the license plate opening. These need to be cut back so that the bumper will fit up flush against the beam. Cut the rib back to within 1/4 inch or less of the cover, or it just will not fit against the beam. You will need to make two more cuts, one each side, in the "rib" below this one when you got to put the cover back on. I have not marked these cuts as it is best to do them when the bumper cover is refitted to the car. As much as it is tempting to just cut this rib all the way back too, I would advise against it as the ribs do help keep the bumper's shape. The rib above it HAD to be cut in order to fit, but this one just needs a notch put into it. |
|
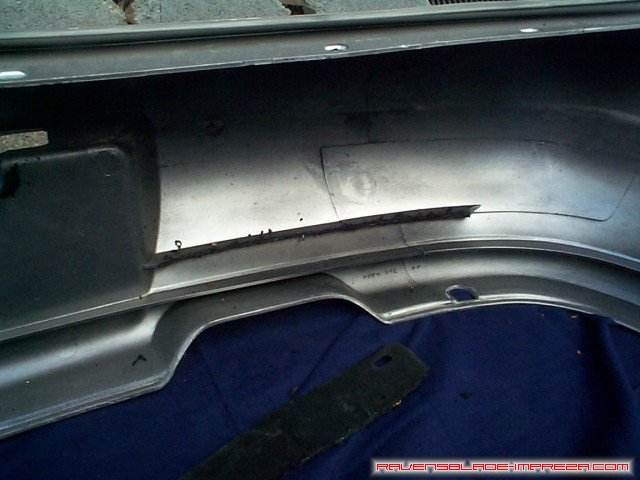
Just a close up of the other "rib" after being cut, with no red dots in the way. |
|
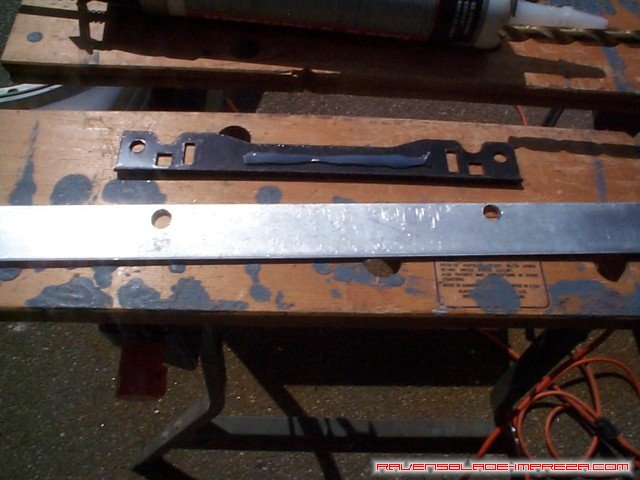
In this picture, you see the stock bumper cover, looking at it from the back side. The item labelled "1" is the license plate bracket, and is removed by popping the two clips marked with red dots off. The items labelled "2" are the license plate lights, and will also need to be removed for reuse later. Just remove the four screws and they will come right off. |

|
This is a picture of the license plate bracket. The two white items are where the screws that hold the plate on screw into. They need to be removed. |

|
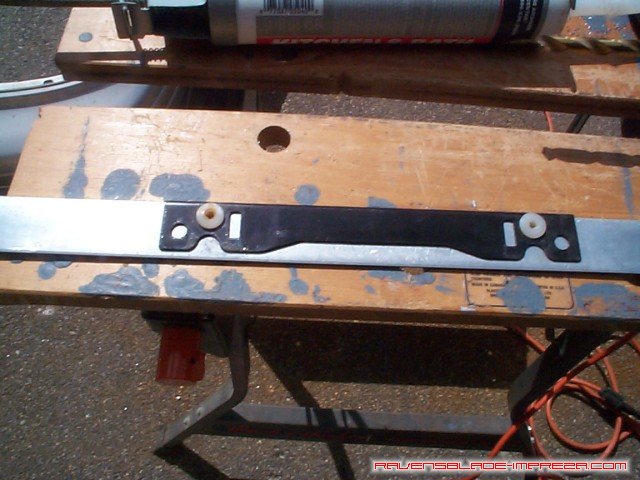
In this picture, you can see how I am intending to mount the smaller stock license plate. I obtained a one inch by 3 foot long by 1/8" thick piece of flat aluminum stock at the hardware store. This, I cut to length to fit across the license plate opening (approximately 18 inches long). After finding the center, I laid the stock license plate bracket against the bar stock and marked for two holes. These holes are 7/16" wide. They are they to allow the white plastic screw holders to pass through the bar as they are about 1/2" long and need the space. I ran a bead of marine silicone sealant (it is very strong and can even be submerged in water without coming loose) down the license plate bracket, flipped it onto the bar stock, and then snapped the screw holders in place. |
|
The completed license plate bracket. |
|
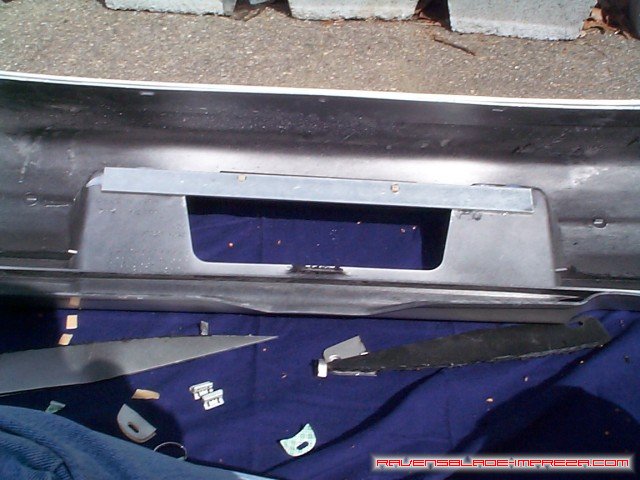
After allowing the silicone holding the bracket onto the bar stock to set up for about an hour, I ran a bead of the silicone down each end of the bar, placing it on the backside of the bumper cover, all the way at the top of the opening. I left it out of the picture for clarity's sake, but a piece of tape at each end of the bar stock will hold it in place until the silicone sets up. The license plate lights were attached in a similar manner just above the opening, centered on the white screw holders, and again, attached with marine silicone sealant. I simply forgot to get a picture of them reinstalled, but it is fairly straigtforward. At this point, it is time to take a break for lunch, as the silicone needs to set up hard before the bumper cover is moved around to attach it to the car. You should probably wait at least an hour, maybe two, just to be certain things will stay put. |
|
Reinstallation of the bumper cover is nearly identical to the removal, but with a few snags. First, the reinforcing foam is no good to you- you will not be able to make it fit, and you do not really need the foam anyway. They do make GREAT tusks if you plan on being a mammoth for Halloween though! You will be able to put all the top clips back on the bumper cover with no problems. When you have done so, push the bumper beam back onto the car and bolt it back down, reversing the proceedure you used to remove it that you found here. You will notice that when you try to pull the ends of the bumper cover up to clip them back on, you will not be able to. You will be able to get about as far as in the picture above. It is time to get under the car. |

|
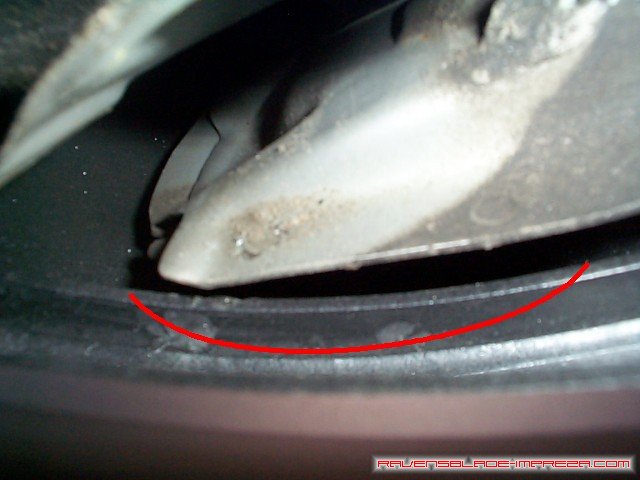
In this picture, you can see the piece of metal that it preventing you from finishing what has not been an all too difficult job so far. This is the very corner of the bumper beam. I had tried bending it out of the way, but it is much harder than shaving the rib on the bumper. You need to put in a notch about 2 or 3 inches long in this rib, which could be done with a razor knife or a Dremel. I used the Dremel with a round sanding drum, and it did the job quickly. You will be cutting an arc approximately across this red line. Cut a bit away, then try pulling the bumper cover up flush. You should not have much resistance, if any, at getting the top edge of the bumper cover from meeting up with the bottom edge of the rear quarter panels. Cut away a bit at a time until you can make them meet up. The only fasteners I found neccessary to hold the bottom of the bumper cover on are the two on the bottom right near the wheel wells. If you do a good job cutting the upper ribs and cutting the notch in the lower rib, it will fit very snugly against the bumper beam. |
|
Ahhh... the fruits of a day's labor... |
|
Full view from behind- I added the a new set of Version 6 spats and the Aero Mudguards I had to the Version 6 bumper when I finished it up. |

|
Right side profile |

|
A close up of why the Version 6 Spats do not fit flush against the Version 2 bumper- they were made to fit the curved lip on the Version 6 rear bumper. This is the left side spat... |

|
...and this is the right side spat. |
