Lighting Front Grille Badge
 |
This is a quick page on how to backlight your OEM or aftermarket front grill badge. If you have any questions or comments, please direct them here. |
 |
This is hardly a high-tech approach, but it is inexpensive and is a clean install once done and done carefully. It may be a little hard to follow, as I have this mod already done, but you should get the idea. Keep in mind, you need at least a semi-transparent badge for this to work well (though a stock badge looks REALLY good if you carefully remove just the silver "stars" portion). OK, let's start this by opening the hood and taking the front grill off. See the two holes in either end of the grill? GENTLY push a flathead screwdriver straight down into these holes one at a time, and gently pull the edge towards you. The top will pop out. Go and do the other side, and then pull up and out, and the grill will come right off. |

|
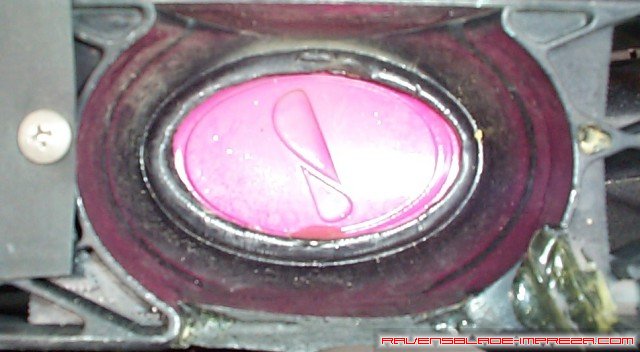
OK, with the grill off, you need to get the stock badge out. There are two schools of thought to this: gently pry from the front, or drill a hole from behind. Since you will be making a large hole in the grill anyway, I vote drill. Pop a small hole in the back (a 1/4" bit should do) and gently push the badge off of the grill. Either way, it must come off. Once you have the badge off, you will notice there is a small "lip" around the inside edge of the cup for the badge. You need to cut out the whol badge depression EXCEPT for this lip: you will need that lip to attach the badge to. In the photo below, you will see my grill and badge from the backside- just outside the pink of the "I" badge, you will see the "lip" I was speaking of. With that done, I simply glued my badge in with epoxy, so it won't fall out and nobody will steal it. |
|
The next picture is of a high-intensity (about 5 Watt) side/clearance marker light I picked up at Walmart. It fits the requirements nicely: it has a bright bulb, is about 1.5" long (fits in the depression nicely), and most importantly...cheap! As you can see, I already have it wired to positive and negative. I recommend using about a 4 to 6 foot length of wires, so you can take the grill off and move it out of the way as necessary. You could alternatively put a set of quick disconnects in the lines so you can take the grill off completely. |

|
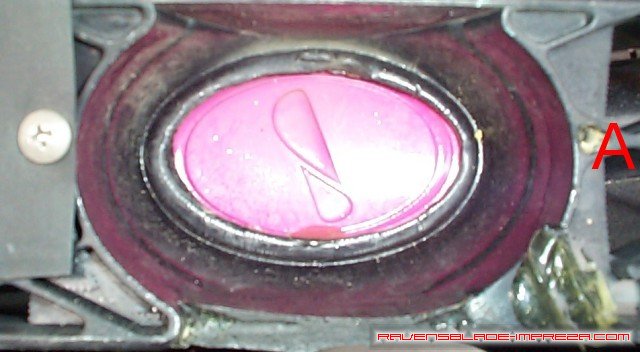
Next thing to do, is to make a reflector for the light. I simply used a small piece of aluminum and painted the backside black. Then, I used some small stainless steel screws to attach it to the grill. I used some epoxy to fill in two of the depressions (there is one on each side, right next to the badge cup), to give the screws something else to bite into (see "A" below). Keep them SHORT, so they don't protrude through the grill! |
|
With that done, simply screw the reflector on |

|
At this point, it is necessary to remove the corner marker light, as the wire harness for the corner marker light is where we are going to tap the power and ground. It is simply one screw to remove, and then GENTLY pull straight toward the front of the car to remove it: it will make a "pop" and then you need to wiggle the light out. The picture below shows the screw you need to remove. |

|
That being done, you just need to run your wires through the engine bay towards the headlights. Right next to the headlights, you will find small space where you can run the wires in towards the inside of the fenders. It will take a bit of doing, but you need to get those wires to pull through where the wires for the corner marker light are. The wires on the corner marker light are handily black for ground and red for +12 volts, and you just tap your + and - wires from the light behind the badge to these wires, as seen below. |

|
At this point, it would be a good idea to turn the car on, turn on the lights to at least the "parking iight" position, and make sure your light works. If not, you need to check your connections. It should turn on just with the parking lights (it will stay on when you switch to headlights as well). With everything working, you can reverse your steps, and put the corner light back in, making sure to push it towards the rear of the car until it "pops" and then screwing it back in. Now, just pop the grill back in, and your done! You should get a nice effect, something like this: |

|
Daytime, does not seem too special.... |

|
At night, when it really shines! |